AllFreePrintables.com
Free Printable Bookmarks | Chore Coupons | Checklists | Seed Packets | Mother's Day Printables |Easter Printables | Christmas Printables | Valentine's Day Printables | Halloween Printables | Kitchen Prints
Free Printable 3D
Easter Bunnies
by Jane Lake
Allfreeprintables.com All Rights Reserved
Print one paper Easter bunny or an entire bunny family in assorted pastel colors for Easter. We also have blank bunnies if you prefer to color your own!
These 3D paper bunny models are easy to make - all you need is a computer, printer, paper, scissors and a little glue.
How to Assemble the Paper Bunnies
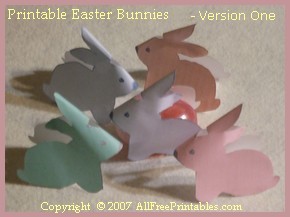
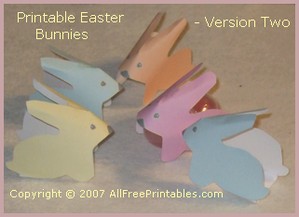
As you can see, there are two versions - similar in appearance, but Version Two is easier for small fingers to cut out and slightly faster to assemble. All the paper bunnies are large enough to hide a hard-boiled egg or plastic treat egg, so they are perfect disguises for your Easter egg hunt.
 Version One1. Print your choice of our bunny templates. You can choose from:
 2. Cut carefully around the bunny template.
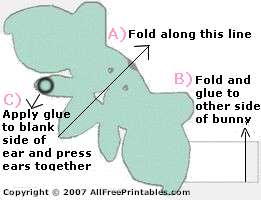
3. Following the diagram at right, gently fold the bunny in half with the center fold line at the top, so both halves of the bunny line up together. Do not press the fold line too firmly.
4. Snip out the small white triangle that appears at the top of the bunny's head.
5. Fold up the rectangular section to form the bottom of the bunny. Fold up the end of this section to form a small tab. Add a little glue to the tab and attach to the other side of the bunny.
5. Glue the tip of one of the single ears to the matching ear.
Suggestion:
Print a pastel rainbow of bunnies and use them as placeholders on your Easter dinner table.
If you liked this project, you may also like the free printable Easter baskets on our sister site. We also have Free Printable Easter Cards or Printable Egg Stands right here on AllFreePrintables.com. 6. If desired, slip a treat egg or real egg inside the bunny.
Version Two
 1. Print your favorite color of the Version Two Bunnies. Choose from:
 2. Carefully cut around the template of your choice.
3. Fold up the rectangular section to form the bottom of the bunny. Fold up the end of this section to form a small tab. Add a little glue to the tab and attach to the other side of the bunny.
4. Cut along the grey line at the top of the bunny's head, as shown on the diagram at right. Add a small amount of glue to the back edge of one side of this cut, then overlap the sections until the bottom of the ears almost touch. This gives the head a more three dimensional look.
5. Gently crease the ears so they are rounded on top rather than flat; try to avoid creating a fold line. Just pinching the paper ear together with your finger and thumb is usually enough to give it a faint crease and rounded shape.
1. Print your favorite color of the Version Two Bunnies. Choose from:- Blank Bunny - Version Two
- Blue Bunny - Version Two
- Pink Bunny - Version Two
- Yellow Bunny - Version Two
- Green Bunny - Version Two
- Tan Bunny - Version Two
 2. Carefully cut around the template of your choice.
3. Fold up the rectangular section to form the bottom of the bunny. Fold up the end of this section to form a small tab. Add a little glue to the tab and attach to the other side of the bunny.
4. Cut along the grey line at the top of the bunny's head, as shown on the diagram at right. Add a small amount of glue to the back edge of one side of this cut, then overlap the sections until the bottom of the ears almost touch. This gives the head a more three dimensional look.
5. Gently crease the ears so they are rounded on top rather than flat; try to avoid creating a fold line. Just pinching the paper ear together with your finger and thumb is usually enough to give it a faint crease and rounded shape.